This page describes the basic steps to create a simple MIB module.
Install MIB Designer
- Install (run) MIB Designer using Java WebStart if supported by your system from here. Alternatively run
java -jar mibdesigner.jaron the command line.
Create new New MIB Module
Click
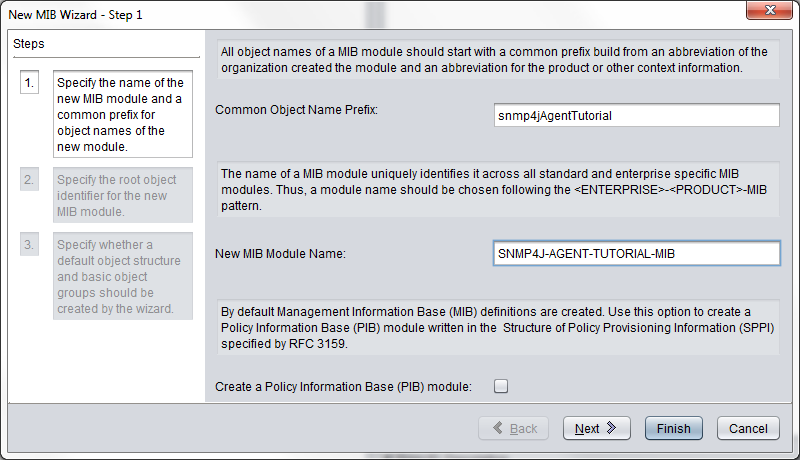
Yesif asked if you want to create a new MIB module using the New MIB Wizard or alternatively chooseFile>New.Specify the object name prefix and the MIB module name for the new MIB module:
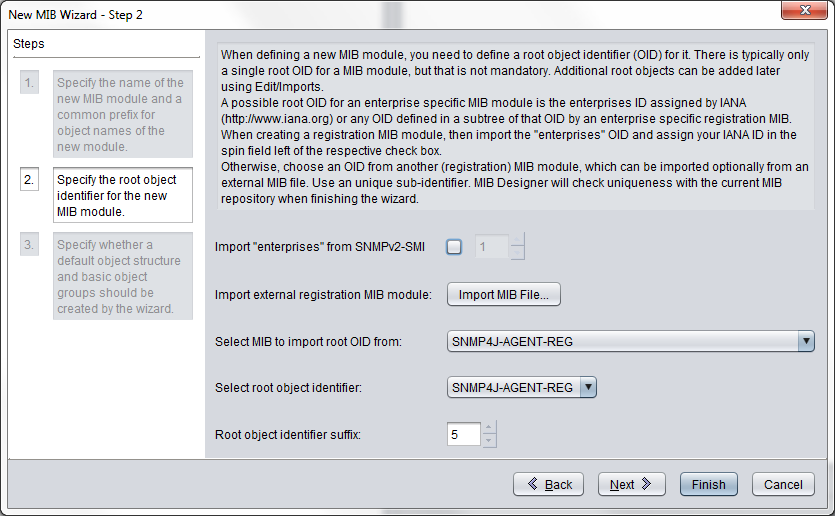
- Specify the root OID in wizard step 2 (here you will have to choose your own values):
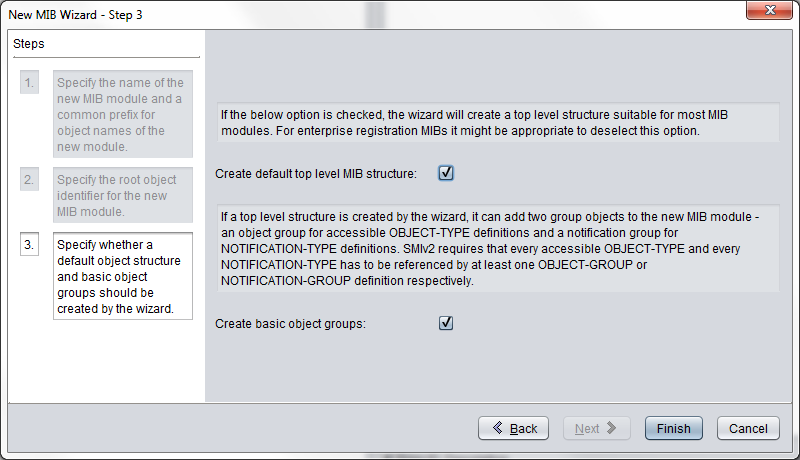
- Specify that a basic object structure should be created:
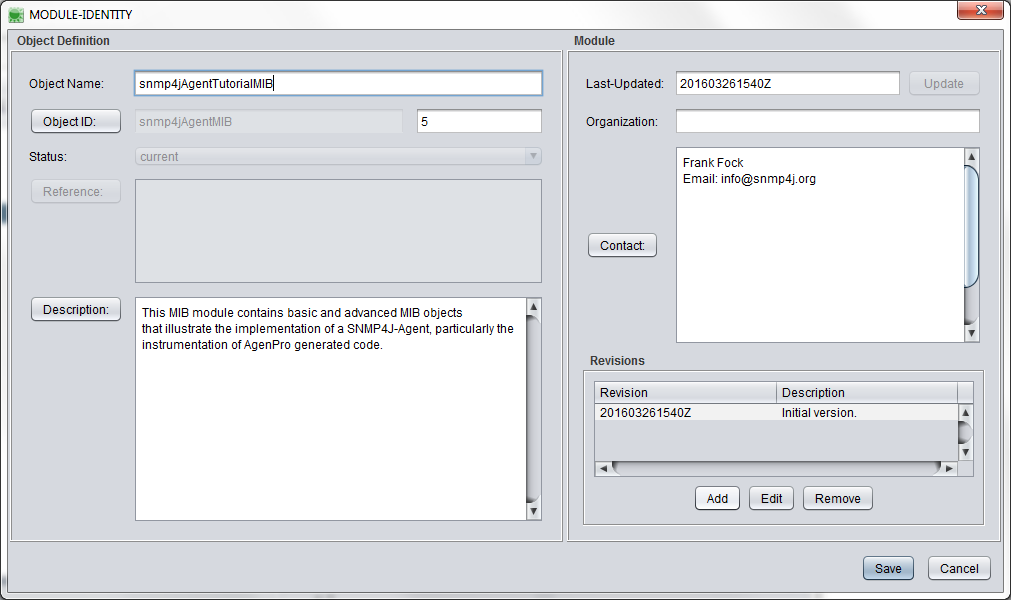
- Edit the MIB module node. It is the top-most node that does not have a folder icon. Add organization, contact-info, and description. Do not add REVISION information now, because that would already release the module.
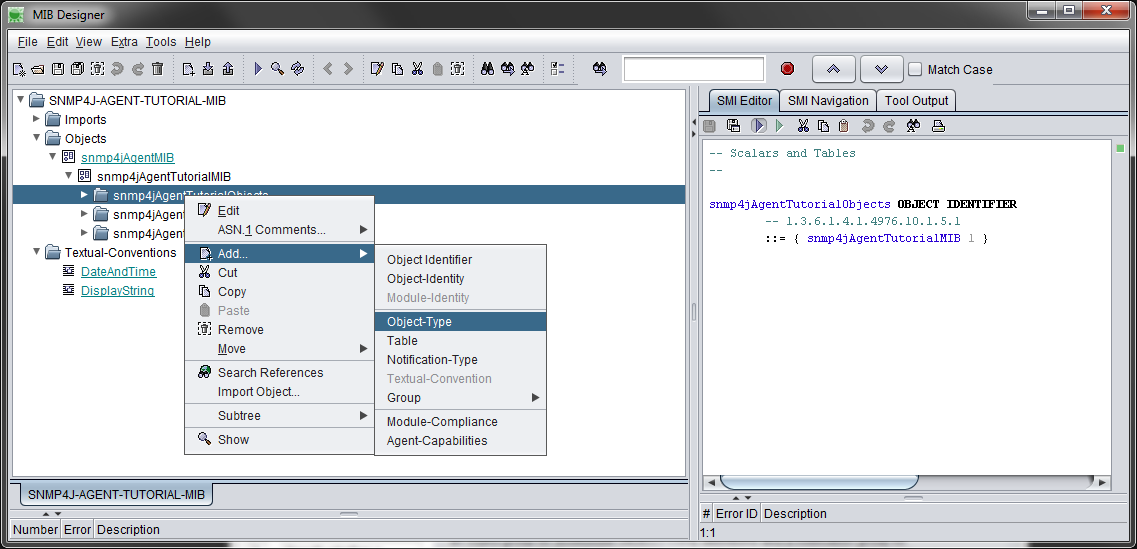
- Create your MIB objects. Typically you define the structure of your MIB module with OBECT-IDENTIFIER and the content with OBJECT-tYPE instances:
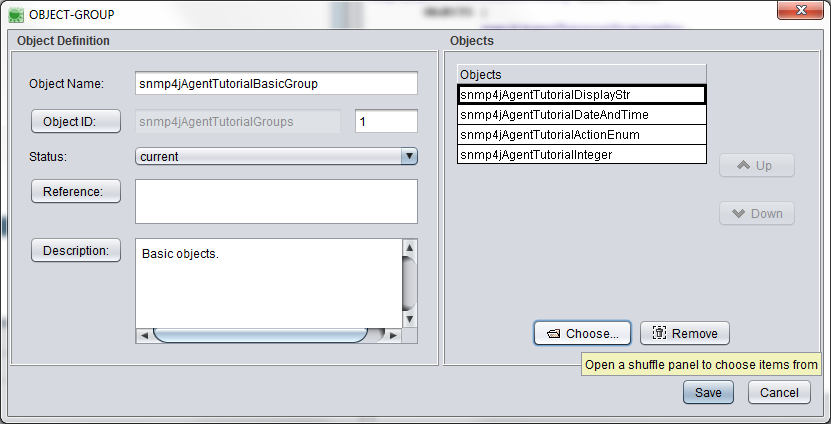
- Once you added your objects, you need to reference them to object groups in the conformance section of your MIB module:
- Check your MIB module with
View>Check(not necessary if auto-check is enabled) and remove any errors. - Release the MIB module by adding a new REVISION entry in the MIB module node:
- Check again the MIB module with
View>Check(not necessary if auto-check is enabled) and remove any errors. - Save the new MIB module with
File>Save. - Export the new MIB module as text file (backup and for usage with non-AGENT++ tools) with
File>Export MIB as.